About a month ago, I attended one of Cathay Photo's organized talks, called "Larry Frank's Wild World Of People, Landscape & Travel Photography" Evidently I was blinded by the word "Wild" to represent Wildlife, so I was quite sad to see next to no wildlife pics presented :P But he did present a few very good tips, and the one that I kept in mind and used the most was how he carried his camera - with a camera strap of course, but carried reversed to what most people on the street carry them. Hence, he'd have his camera and lens pointing in towards the small of his back. This worked a real treat for my usual camera strap (Mine is Paksafe's Carrysafe 100). It was so much easier for walking around crowded areas, and in general, people wouldn't even know I'm carrying a bulky slr since it's hidden behind my back.
Now the problem with that is rapid shooting. Due to the way I prefer to carry it, slung across my body, the camera straps really get in the way when I want to take a quick snap shot. More often than not, I'd just take it off when I find interesting subjects to shoot. So when I saw the R Strap a few days back for sale in Singapore, I thought I'd be nice to pick something up like that for instant shooting. Now I've used it for 2 days, here are the pros and cons:
Pros:
Works as advertised. As the connection between strap and camera is now made at the tripod socket, when you lift it up to your eye level, the straps dangle loose at your chin, nothing getting in the way.
It also feels more comfortable than my old strap. Doh!
Cons:
Oddly enough, I'm not very happy with it for use on buses, trains and general walking in crowded areas. Because the connection point features a 360 joint, the camera does tend to swing in all sort of odd directions when adjusted to hang directly behind in the small of my back. If I adjust it to hang by my side, it does tend to stay in position better, but that allows it to be seen by people.
Again, because my connection point is now at the tripod mount of the body, it is not possible to put the camera flat on a table. A tad annoying here.
I'll be using it for the next few weeks and see how it pans out. I'm quite certain that I'll be keeping it, but further use in the field will be the ultimate judge. They've got a few other models with pockets and what not. But I like to keep things light... if only they had a D200 in a D40x form factor :)
Sunday, December 28, 2008
Friday, December 26, 2008
Update: Skin 75 Pop down

Ok, I've spent two days in the field shooting with this new belt bag, and I like it alot. It fits my 70-300VR with loads of space to spare; I actually use the included divider. I'm sure I could stuff like a snack bar or two to accompany the lens.
As far as sitting down with it, it depends on what you wear. My first day out, my jeans had differently space belt loops compared to the travel cargo pants I wore today. And the jeans worked better :) Perhaps when I'm really bored I'd look into the Think Tank belt.
Overall: I love the fact that it allows me to carry my tele zoom out, and with just my camera slung over one arm. No darned annoying camera bags!
Verdict: Not bad. But probably not for a heavier lens like the 80-400. The 70-300VR was already pushing it.
Tuesday, December 23, 2008
Carry less? Think Tank Skin 75 Pop Down
My first Think Tank product was the Urban Disguise 50. The UD 50 has been an excellent bag for carrying around my laptop + camera gear during flights, or when I'm on a trip, I use the laptop compartment for holding my soft shell. It has served me very well during my 2 weeks touring around Australia, getting on and off buses and what not.
If I'm not shooting wildlife, it's easy; me and my 16-85 for general purpose shooting. I've kinda given up on the 10-20 for now. Actually sold it.
But if I do bring my longer zooms out, I tend to put it in a sling bag. Whilst looking for a more waterproof solution, I came across the TTP Skin 75 pop down. It's designed for 70-200mm pro lenses, which for my dinky consumer 70-300VR is much more than sufficient. The lovely thing is it is big enough to stick in the lens with the hood on, and has a compartment for the lens cap.
Other really nice features include the weather cover, and a velcro sound protection. If you need to use the bag in quiet areas, the velcro area can be covered up. I really, really dislike the sound of velcro going off in quiet areas, guys and gals with Crumplers should know what I mean :)
I don't use a harness system (YET!), so I just slip it onto my regular belts. I've only run it today with my 28mm lens (duh), it actually gets in the way when sitting down, so I'll need to figure out a way of working with this new toy. Overall, I'm loving it. Will fit that 80-400 I'm drooling for at the moment :)
Other brands I've checked out include Saffroto which I really nearly bought as I love the soft feel of their material, and Lowepro's competiting range.
Monday, December 22, 2008
Opera?
Endured a few days of massive sick. And back online. Been using firefox 3 for awhile on my linux system and it's slower than FF2. Kinda bored and still not up to kicks yet so I installed Opera. Seems a tad faster, though took me a few minutes of forum reading to figure out how to install flash :) Let's see how this goes. There is now a nice red "O" on my top gnome bar :)
Damn feel so weak.
Damn feel so weak.
Tuesday, December 16, 2008
SESI @ Siggraph Asia 08
Nothing too interesting to warrant serious pano-ing, but I had to take some pics of the SESI booth!


Didn't do too much at Siggraph; just helped give a short presentation about Houdini on the 12th, and also got a plaque for for helping out sesi before and during Siggraph =) OMG I was so embarrassed!
Ok enough photo playing around. I recently bought Andrew Lowell's Book On Houdini's CHOPs, finally will have the time to sit down and really go through it. CHOPs is one area I've used but only to a small extent, and I look forward to pushing it to the level of the other Houdini contexts =)
D200 @ ISO1600

I've rarely printed my digital files so far; even when I shot my B&W films, I usually got a contact print and then printed out those (few) shots I want to keep.
I recently had the chance to shoot at the Esplande Outdoor Theatre for Nightsound. I was toting along my rental 70-200/2.8VR, and I think because of that plus my really nice dress & siggraph pass, no one stopped me :P
Lighting was really bad; I was shooting wide open @ 2.8, and even at ISO 1600 was getting shutter speeds as slow as 1/15s. Still, I managed to get a smattering of shots for my friend playing on stage (NB there was an official photog, I was just playing around.)
I processed the photos as per normal using Bibble, and settled for a portra-isk kind of look. Now on screen, the 100% view was pretty bad. But I was sure printing to 4R would be fine, but what about larger?
I decided to try one shot of my friend @ S8R size, which is 8x12 inches. Surprisingly, the picture came out quite well! Even the detail down to the straps of his guitar could be seen. If a bad 100% crop on screen is able to print out at that kinda size and still maintain the detail, I would think that if I had my iso100-200 shots, which are generally very clean, they would be able to be printed at ridiculous sizes.
Printing Panos... I'm addicted.

After acquiring Hugin, the software triad is complete - Bibble for RAW processing, Hugin for Pano stitching, and GIMP for misc pixel editing. I really would love to acquire Auto Pano Pro, but I'm just a n00b playing around with photography.
Next step, printing! I found a thread at Club Snap indicating that there was a pretty good place at Bukit Batok, which is about 20 mins on foot from my place. One of the gents working was readily helping me out with my pano images, and got a few tests done on SS6R size, which is 6 x 18 inches. See the image above :) The smaller white photo is a 4R size, which is 4x6 inches. Wowza.
That said, the subject matter in question, even printed at this size (it's the widest I'm told the frontier can print at; the gent told me the largest they can print is 12x18in) is just not enough. I'm actually looking around for a place that can print at 24x36in at a reasonable price - I've got the resolution for a 300DPI print at that size. It would be either a poster print, which may or may not use archival inks, or I may look into printing on canvas.
While it's nice to pixel peep on screen, I think seeing a large artwork on display is much more magnificent. There was also an article I read a while back between field of view of a photo versus the viewing size, unfortunately I can't seem to find it again.
PS: Impossible to see, but the last pano print was at a wedding, about 220+ degrees field of view :) It was during the "Yam Seng" section where honoured guests get up on stage and shout "Yam Seng" 3 times. People were moving all over, but Hugin, amazingly blended all the shots near perfectly.
Wednesday, December 10, 2008
tong ya | panoramic
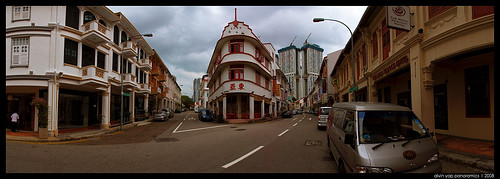
This afternoon heading home from the city. So many shots of this place, but this is my first serious panoramic of it. Estimated field of view was 198 degrees before cropping, using equirectangular mapping.
Stiching done, of course using Hugin. Gimp and Bibble used for the frame and color treatment.
Was going to do a multi-row but I ran out of space on my cf card :P
NB: It seems that hugin has an easier time dealing with the stitch if I correct the lens distortions in bibble first; I have a feeling this will affect the image quality but I think the high stich res should be good for an 8R print.
Sunday, December 07, 2008
Hugin - It straightens! It does!


MWAHAHAHA Got Hugin to straighten out this shot taken using the MK1 Digitus Secundus panoramic head. The tutorials section at the Hugin site were a huge help. I only used 3 control points, for the left, middle and right of the image.... kinda surprised it was able to verticalize so much of the image.
It seems that using the hyperfocus distance on my 16-85 @ 16mm gives my subjects in focus from about 2 meters away till infinity. That's setting the lens to focus @ 1.5m, at F8. I've only tried this 3 times, all panos came out easily assembled. Wish I'd figured that out earlier :P
GW
Hugin - OSS Panoramic tool

North Terrace Panorama, my first week in Adelaide.
Discovered Hugin many days ago, and finally, on my 3rd try, managed to get it installed and running! I followed this link - helped me alot when I was trying to install the autopano-sift-C application. http://wiki.panotools.org/Hugin_Compiling_Ubuntu if not the rest of it was pretty straightforward linux install stuff. Cmake kinda threw me off though...
In anycase, I've been using Hugin for about 5 mins, and the trial version of Autopano Pro for days. Been meaning to buy it but I've been putting it off. A few things to note is that I like the preview of the panorama in Hugin better; it's higher resolution and seems to update very much faster. Hugin also has a whole different slew of projections, like Mercator, Fisheye, Equilinear. Not that I have any idea what they really mean :P Still haven't figured out how to straighten horizons like Autopano Pro. I'm going to be giving this baby a whiz right now. The above pano was rendered about 8k wide, and the blending seems to be excellent.
Think I'm going to lay off Houdini for a bit and play with Hugin :)
Subscribe to:
Comments (Atom)